
The Dragon Tamer was my 2016 Halloween costume, and my first foray into using custom laser cut parts for puppet fabrication. Using my traditional "old school" methods in combination with "high tech" tools allowed me to create a puppet with more scale and expression than previously possible.
Planning It Out

Wrapping my mind around how to build the internal structure of the puppet and the materials necessary.

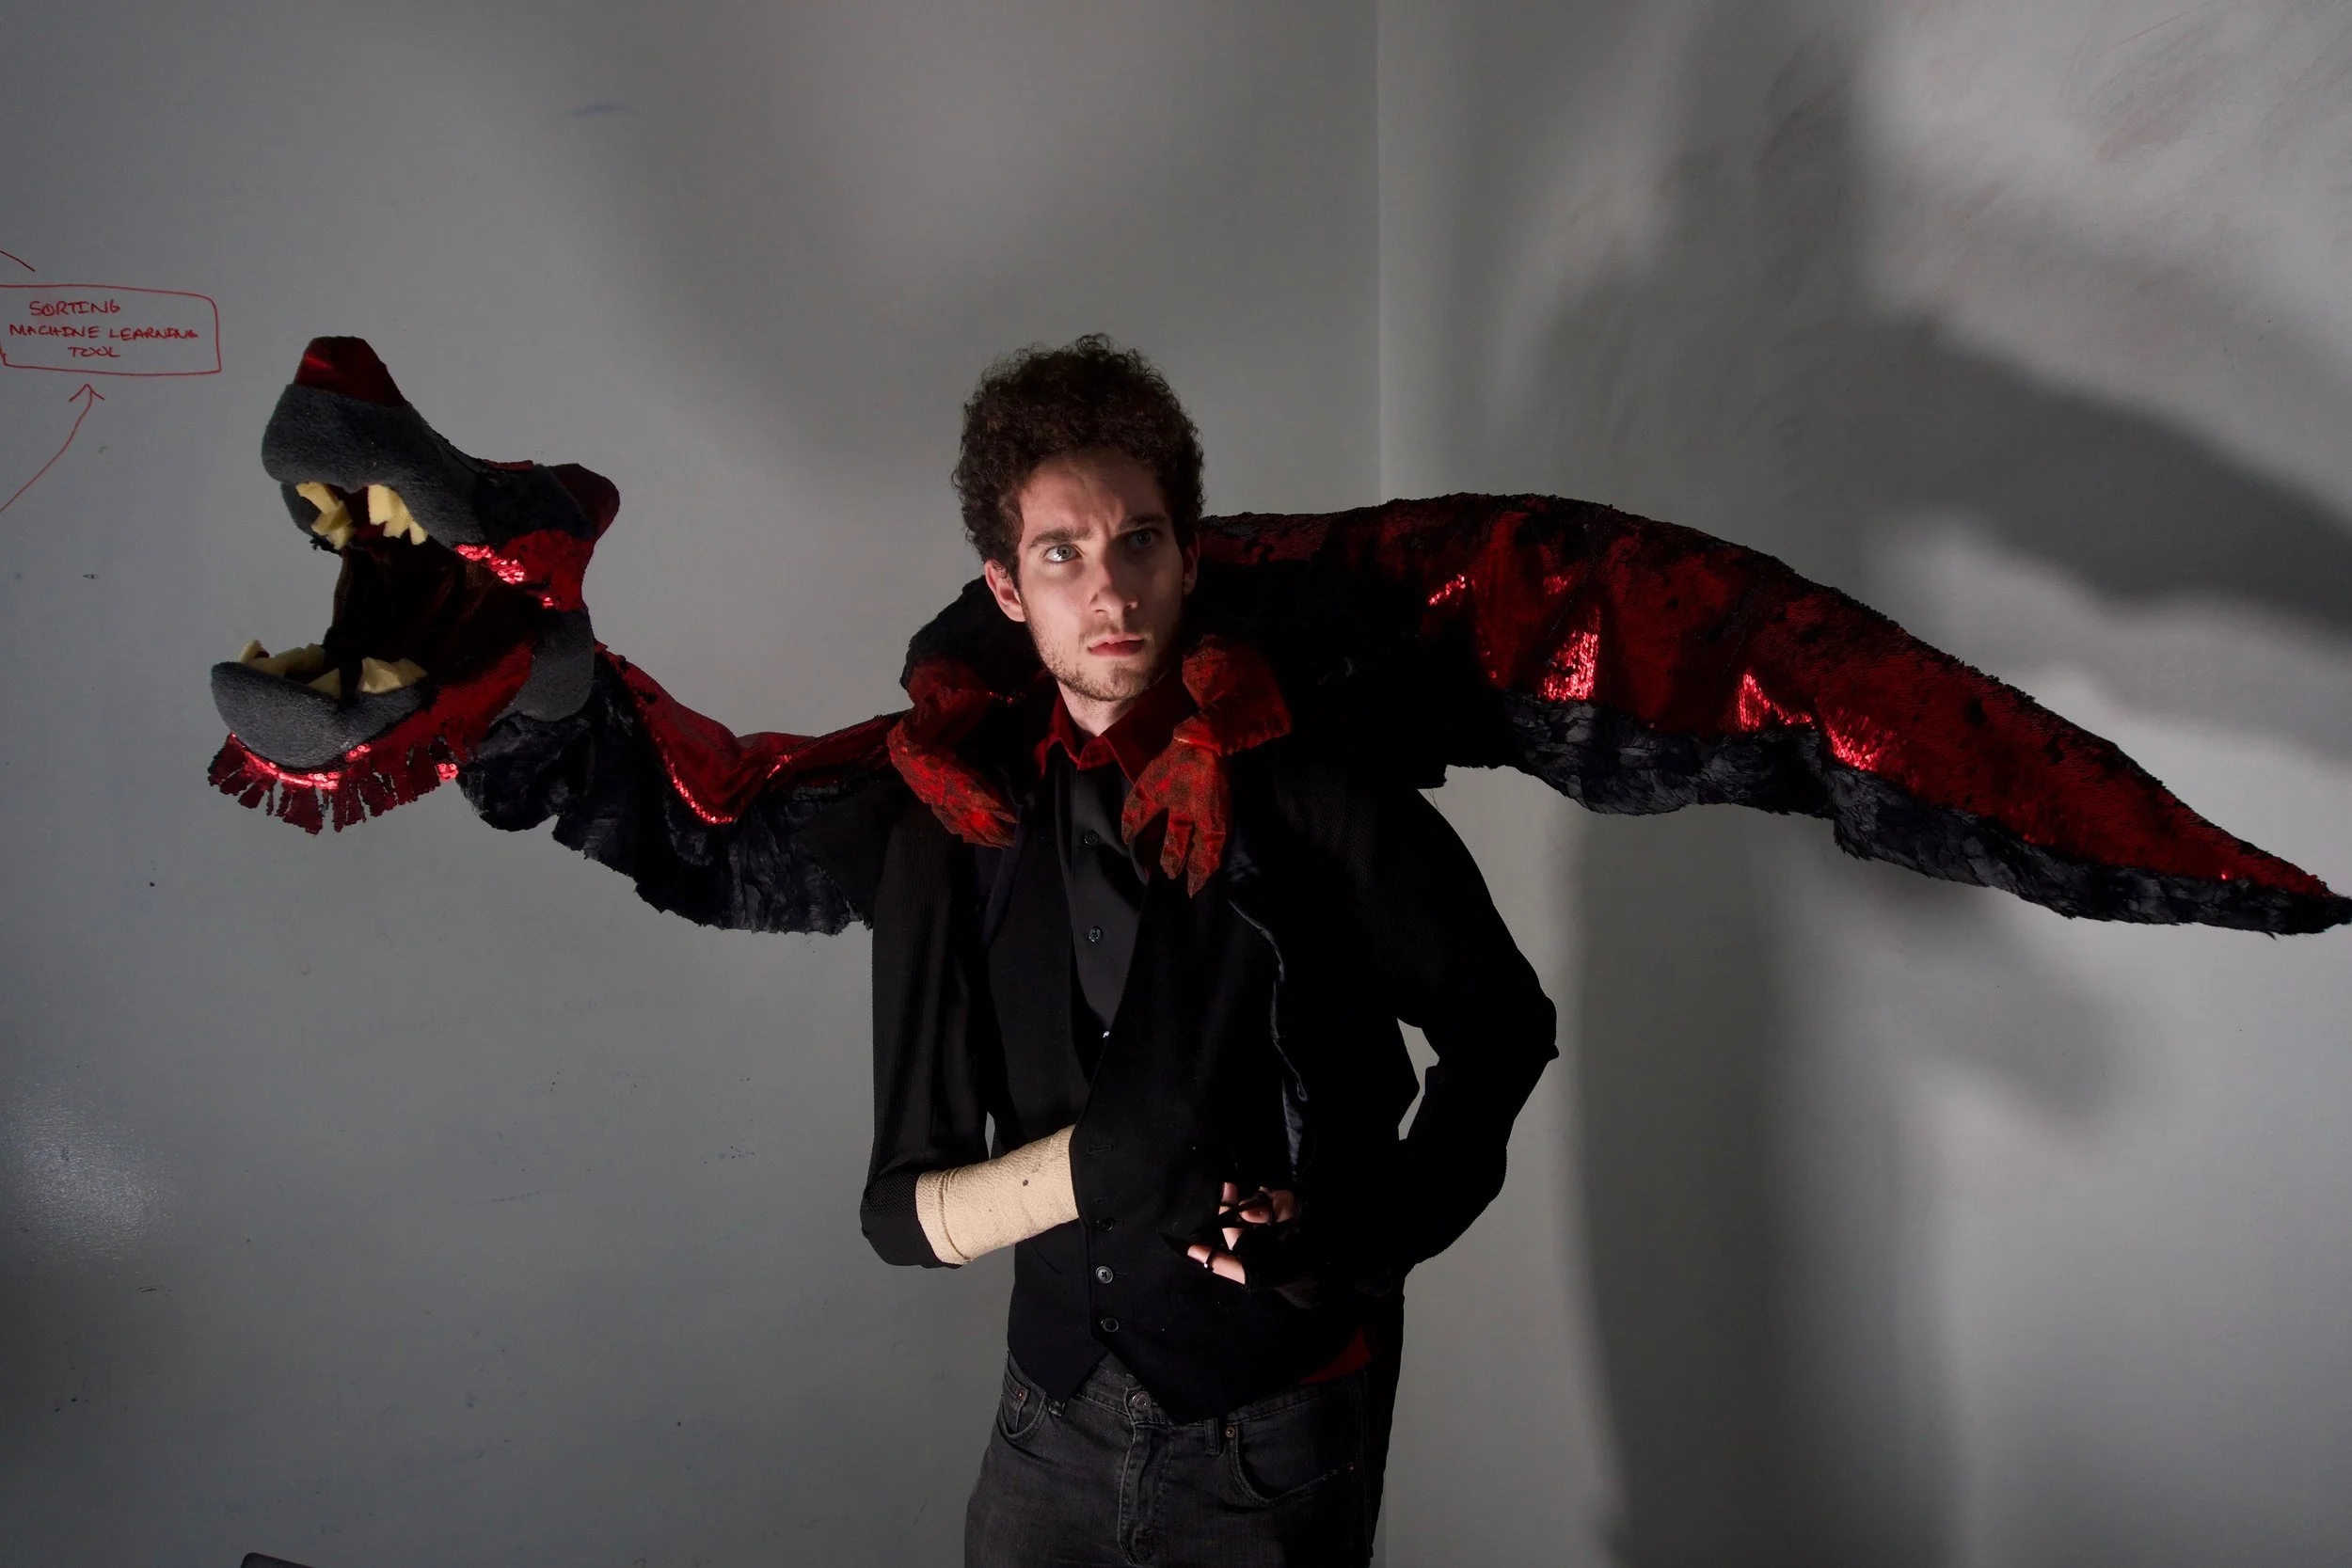
The costume/character of the Dragon Tamer. Notice the details of the tailcoat, eye patch, and claw glove.
By the end of the first week of my Freshman year of college, I had decided that for Halloween 2016 I was going to be a dragon tamer. This would entail not only building a 6-foot long dragon puppet to perch and writhe on my shoulders, but also a costume to supplement the dragon. What followed was 2 months of intense planning followed by improvisation and exploration of numerous new fabrication styles and materials. Along the way I gave myself a crash course in 3D modeling/3D printing, laser cutting, and the intricacies of the Los Angeles fashion district. This is the legend of the Dragon Tamer.
Building the Dragon
I built the skeletal structure of the dragon's body and tail out of laser cut plywood, which I attached to a backpack I cannibalized to strap onto my shoulders and back. The paths for the laser cut pieces were drawn out in Adobe Illustrator. I based the design of the tail off of those wooden toy snakes, where they have a fairly fluid degree of motion swinging from side to side but are completely rigid in the up and down plane.

Tail set up in the workshop. Notice the joints between each tail segment are made out of handy dandy duct tape, which held up great. Also notice the red pegs attaching the tail to the body, which I 3D printed to perfectly interface with the laser cut parts and reinforced with wood glue. This photo was taken 2 weeks before Halloween.
While building the skeleton, I was also hard at work making the skin that I would dress the dragon in. I spend a lot of time over several visits exploring the LA fashion district and the overwhelming amount of materials at my disposal. I decided on two-grain sequined fabric (that later would be catch on to create trendy pillowcases and other crafty items) to represent the dragon's scaled, and this matted faux-fur for the underbelly. I wanted the textures to look realistic, not cartoony.
Because of the unique properties of the materials, I had to hand sew all of the seams instead of use a sewing machine. This resulted in hours of meticulous work. The tail alone was 3 feet long and had 4 panels to put together, meaning 12 feet of hand-stitching to do on my own. This took hours upon hours of sewing, and that's just for the tail! But the end result of this attention to detail was well worth it.
Below is a picture of the tail in progress and a video of me wearing it for the first time.

The tail, almost completely sewn together, and taking up most of my dorm room bed. As I didn't have a designated workspace for large scale projects I did most of the sewing in my dorm. This photo was taken 2 weeks before Halloween.
I carved the dragon head out of a block of foam based off of a 3D model my friend Liam Blaize Maddox made. The original idea was to 3D print the head from scratch and detail it to fit the rest of the puppet, but we didn't have a printer large enough for the job and the filament would be too expensive, so I decided to go ahead and use a method I was well familiar with.
I used the same method for the legs and claws of the dragon, painting the exposed foam with red and black acrylic paint to create a rough, skin like texture.
Accessorizing

The success of the Dragon Tamer was not just dependent on the puppet, I also had to make a costume to fit the look of the dragon. I decided I would make myself a tailcoat with a sewing template from the fashion district, and assemble the coat itself from scraps of black and red fabric bought in a bargain bin. Though I am experienced with sewing puppets, I have little experience with sewing clothes, which requires a very different bag of tricks than making a puppet. Ironically, the tailcoat was more challenging for me to make than the dragon itself.
But my favorite part of the Dragon Tamer costume would have to be the claw glove. The claws were made of laser cut black acrylic and stitched with elastic onto a fingerless glove I had. My rationale of the Dragon Tamer's story was that I would need a special glove to handle the dragon with due to its heat and viciousness. It wouldn't respect me unless if it felt the touch of another dragon on its hide. Hence, claws.
The Final Costume

Notice that the dragon and tailcoat are one piece. The neck of the dragon connects to the right shoulder of the tailcoat like a sleeve, allowing me to puppeteer the dragon's head while the dummy right arm rests in a sling, as if the dragon has maimed my right arm recently and I am healing.

Dragon back scales detail

Dragon mouth sinews detail

Dragon claws/tailcoat paneling detail

And the Money Shot...

Click below to watch a video of the dragon in action.

Recently the dragon had to be slain to make room for new projects. RIP my dragon friend. May your bad-ass-ness live on forever.